Really pleased to have won the ‘best documentary video’ category and get ‘highly commended’ overall at the Siena Drone Photography Awards. There would normally be an awards night in Siena at the “Teatro dei Rinnovati” theatre, in October, during Siena Awards Festival…. but not sure that will happen this year…. to see the other winning work check out the awards here https://droneawards.photo/gallery

Micro 4/3 vs Full Frame and Speed Booster lens comparion.
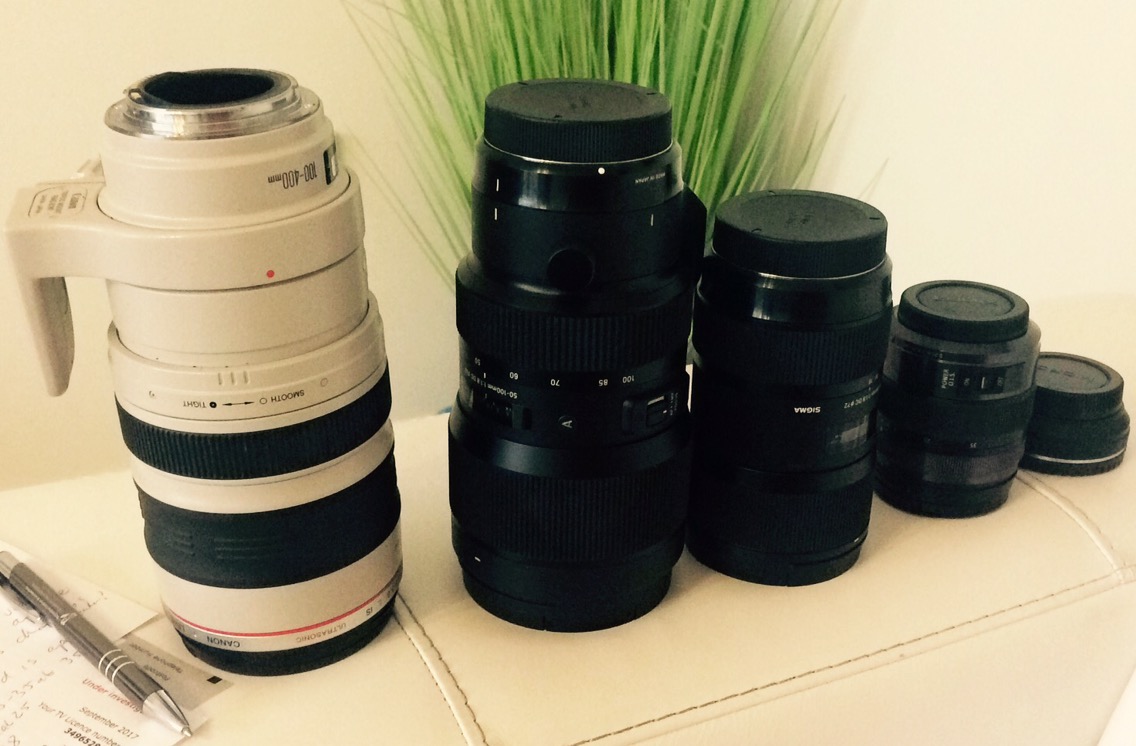
If you use a Panasonic GH5 or GH4 or any other micro 4/3 lens system, you maybe tempted to buy a speed booster or focal reducer to try to get a shallower depth of field and another stop of light onto the smaller sensor. This week we have been testing the lenses again, and are starting to like the light weight and sharpness of the native Panasonic Lumix lenses. We will add more images here to show as examples, but will for sure for corporate videos start using the micro 4/3 lenses, and keep the full frame Canon and Sigma Art lenses for more creative fims. We also like the look of the images with the native lenses on. For a comparison please see the following video from Sareesh Sudhakaran.
Panasonic GH5 Firmware 2.0 released:
We have just updated our Panasonic GH5 cameras to the new release firmware version 2.0. This has opened up the promised 400Mbps all internal codec and recording onto the latest V60 and V60 speed SD cards. We also use the Atomos Ninja Inferno external recorded with the GH5, and we were keen to test this new codec against the Apple ProRes HQ that the Atomos external recorder offers.
Without posting images and samples yet we are really pleased with the new recording format. In comparisons with the Apple Prores we would say this internal recording format fits in between Apple ProRes HQ and the ProRes 422 codecs. Which considering it is all internal is a really good feature of the GH5. We are really impressed with this camera. This camera is really offering broadcast quality HDR 4K video.
Philip Bloom Cinematic Masterclass:

We have always enjoyed Philip Bloom’s films. We have also just had a peak at his new Cinematic Masterclass… this is being sold on Mzed for $199. In this he offers some great tricks and tips and some of his methods which are really useful. We really have the upmost respect for Philip, but feel that Mzed might have let the side down a little.
We presume the videos are hosted with Vimeo, but we have had non stop buffering issues, making the videos almost unwatchable online. We are using a tested fibre broadband connection which is tested working at 30Mbps, so presume the issue is at their end. You also have the option to download the films, but they are in 4K, which makes the file size large, for watching on a mobile device, which is what we planned on doing. We would really like to see a small low res, mobile friendly version available to download Wolfcrow style.
We have emailed Mzed with no reply to our email, again which when they are charging $199 makes you think twice. I guess it is possibe the online video is stuck in 4k and our computers are struggling witht that, but again with no communication from them we do not know.
The course is good, but again there seems to be multiple mentions throughout the course of material that never seems to come. At least twice an episode regarding post production and colour grading is referenced, but this seems to be missing. In the last episode again, Philip talks about the post section coming up, and then the episode and series seems to finish… it would seem that maybe they have made more, but not included them in this series? Again we do not know, and it seems that only good reviews for Mzed get their comments left, all bad reviews have no comment… so again not sure…. we are not an affiliate, but anyway here is a link to the series… Philip Bloom is a great award winning film maker but not totally sure about this series……
You can judge for yourself here.
ND Filter Test.
Updated Sept 2017… we have done some more tests with the Heliopan ND vs Fotga are are blown away by the quality of the Heliopan… we are totally sold on these filters… they may be expensive but the difference in image sharpness speaks for itself… see images from today below (click images below to view full size):
No Filter

Fotga ND Variable Filter

Heliopan Variable ND Filter…

We are always keen to use the best equipment we can to get the sharpest images we can… we have just started using the HelioPan ND filters, and were keen to see if for the money we could see the difference between this, no filter, and a much cheaper Fotga ND filter… We are really pleased with the difference.. Can you guess which image has the Heliopan, the Fotga, and No Filter….
Fujinon Cine Lens open day with Philip Bloom.
Today we have spent the day checking out the new cinema lens from Fujinon the MK 18-55mm T2.9 with film producer Philip Bloom. His recent credits include work with Lucasfilm, Discovery HD, Five, Living, Sky One, and more. We have always been fans of his work, and for sure are fans of this lens now. Check his site here.


Essex Boys Video:
We have just finished editing the video, actually of my kids filmed on Mersea Island, in Essex this summer.. And before I go any further and anyone hits the roof, no drones were flown near the kids or on private property. Seriously drones can be dangerous, and should never been flown near or around kids, nor on private property without the owners permission. It is possible to use masts, and hold the camera in your hand to film as well..
All the close shots, and shots filmed on private land were done using the gimbal on the drone, but without the drone being powered up, and using it as a handheld camera. All of the aerial flying shots were taken over the open sea, as some of the beaches at Mersea are privately owned… as always check before you fly.
The camera and gimbal used were a SJ5000x GoPro equivalent on a simple tarot gimbal. Shot in 4k 25fps or 1080HD at 60fps. Thanks to a great photographer we met there in the summer called Kat Jones (see Kat Jones Photography), for inspiring me with the Magic Hour app, to get up and film this at sunrise one morning. With no one around, and the tide fully in, the wind dead calm, the sea was like a mill pond. I flew 5 flights that morning, and the quality of the light and shots inspired me to edit this into a short story film of the boys on their Mersea Island holidays this summer. With the boys having their usual fun, and around 1 hour of video shot that morning I knew I had enough for a film about the boys fun on Mersea, with a little heart in it (I think anyway!) The human element of the film gives it that little extra over just nice scenery (again I think!)
Lots of the shots over the sea are flown very low, maybe even 50cm over the sea. With the calm sea this was possible, but I would recommend practicing your flying before doing anything like that, as if you even as much clip the sea, your rather expensive drone will be gone for good. As with all remote flying, disorientation and perspective play a big part when you are flying a fair way out… so practice in safe places. Again… easy to fly into the sea… (never done it.. yet). The key thing here is keeping the drone within line of sight. You can fly sideways, backwards, and forwards, and the combination of them gives a good change between shots.
With the small lens on the SJ5000x, it will always struggle in low light, and it does stuggle with the contrast of the Sun coming up against the dark, but we have done our best. The film was edited in Adobe Premiere and output in 1080p HD. The first thing we do in Adobe Premiere with a camera like this, is to remove the fish eye effect with the lens correction tool. For the SJ5000x, I have used the GoPro Hero 3 setting, with the gain turned from -31 to -16… this seems to work well for me, but more on the post editing later. With the SJ5000X I prefer it set to full wide 2.7k setting as most of the other settings are just a crop of this anyway… The 60 frame mode gives smoother video as well for fast movements. Personally I always set the SJ5000X to ISO 400 max, as the camera sucks when it goes higher. I turn off auto white balance and set it to what is appropriate where I am filming. The gimbal the camera is on is just a 2d Tarot gimbal, which suits this drone, but would give better results on a 3d gimbal.
POST EDITING.

The first step in Adobe Premiere is to correct the lens distortion from these small GoPro size cameras. This is done in the latest Adobe Premiere by using the Lens Correction tool. Below is a shot of my settings for the SJ5000x. The new firmware for this camera is suppose to remove some of the fisheye, but still needs further correction.

You can see the effect is has in the image below… makes the lines and horizon straight…

The next step is the great warp stabilizer tool, to help make the image even more stable. Again a little bit of trial and error is the way here, as some of the shots use the subspace warp setting, and some the position setting. It seems that the shots taken with the sea in the lower part of the image, subspace warp struggles with and I was getting a jello effect… I know it takes time on the computer, but try and try again until you get the settings right for your video. Also tick the detailed analysis box… takes longer, but is worth it. This is where if you pay us for video work, you get your money’s worth… as this does take experience to get right. Below is an image of some of the settings… I was using around 12% stabilisation, and as always have the detailed analysis checked.

Next step was the colour and grain adjustment…. We used some of the preset settings for this from Adobe…For the colour, I was planning on using the filmconvert module, but actually now as the latest Adobe Premier has Lumetri presets and Filmstock emulators built in I used the Fuji Reala 500D Kodak 2393 for most of the shots.. some may find them a little too harsh, but each to their own. You can see the effect below (I have cut half the image diagonally).

These filmstock emulators really can make your video look way more organic. We are not talking Instagram here. We are talking proper film stock emulation from 8mm to full frame 35mm. The stocks are very accurate, but what really makes this stand out, apart from the ease of use, is all the presets to make your life easier.
The clips are edited together with the music… trying to change in time, and follow the mood of the music. The track is Sigor Ros, and it is a copyrighted track, but they seem ok for it to be used on youtube if they get the money from any ads…. The music is so important for the film.. totally sets the mood.
The aspect ratio was 2.5:1 which is something more seen in the cinema. This was achieved by repositioning the image and using crop.. again maybe not to everyone’s tastes..
For now this is all I will write as it is getting late, and we are still finishing the final editing of the film to get it done.
We are able to offer full video editing and filming services, along with Adobe After Effects commercial logo splash pages etc… to give your company a real professional looking promotional video, check out our video page in the menu above for details on the services.
Check the airspace before you fly.
We are a great fan of this new site and app that allows you to check the airspace of the location you are thinking of flying in. As you can see in the screen shot the London area has much restricted and controlled airspace. Check out the site and app here.

Domain Names.
We also have for sale the following Drone/UAV related domain names for sale:
UAV.IM £1999 Great as a social media handle/email address. (.IM domains are ccltd to Isle of Man)
UAS.IM £1999 Great as a social media handle/email address. (.IM domains are ccltd to Isle of Man)
UAV.UK.COM £499
Please contact us with offers.


